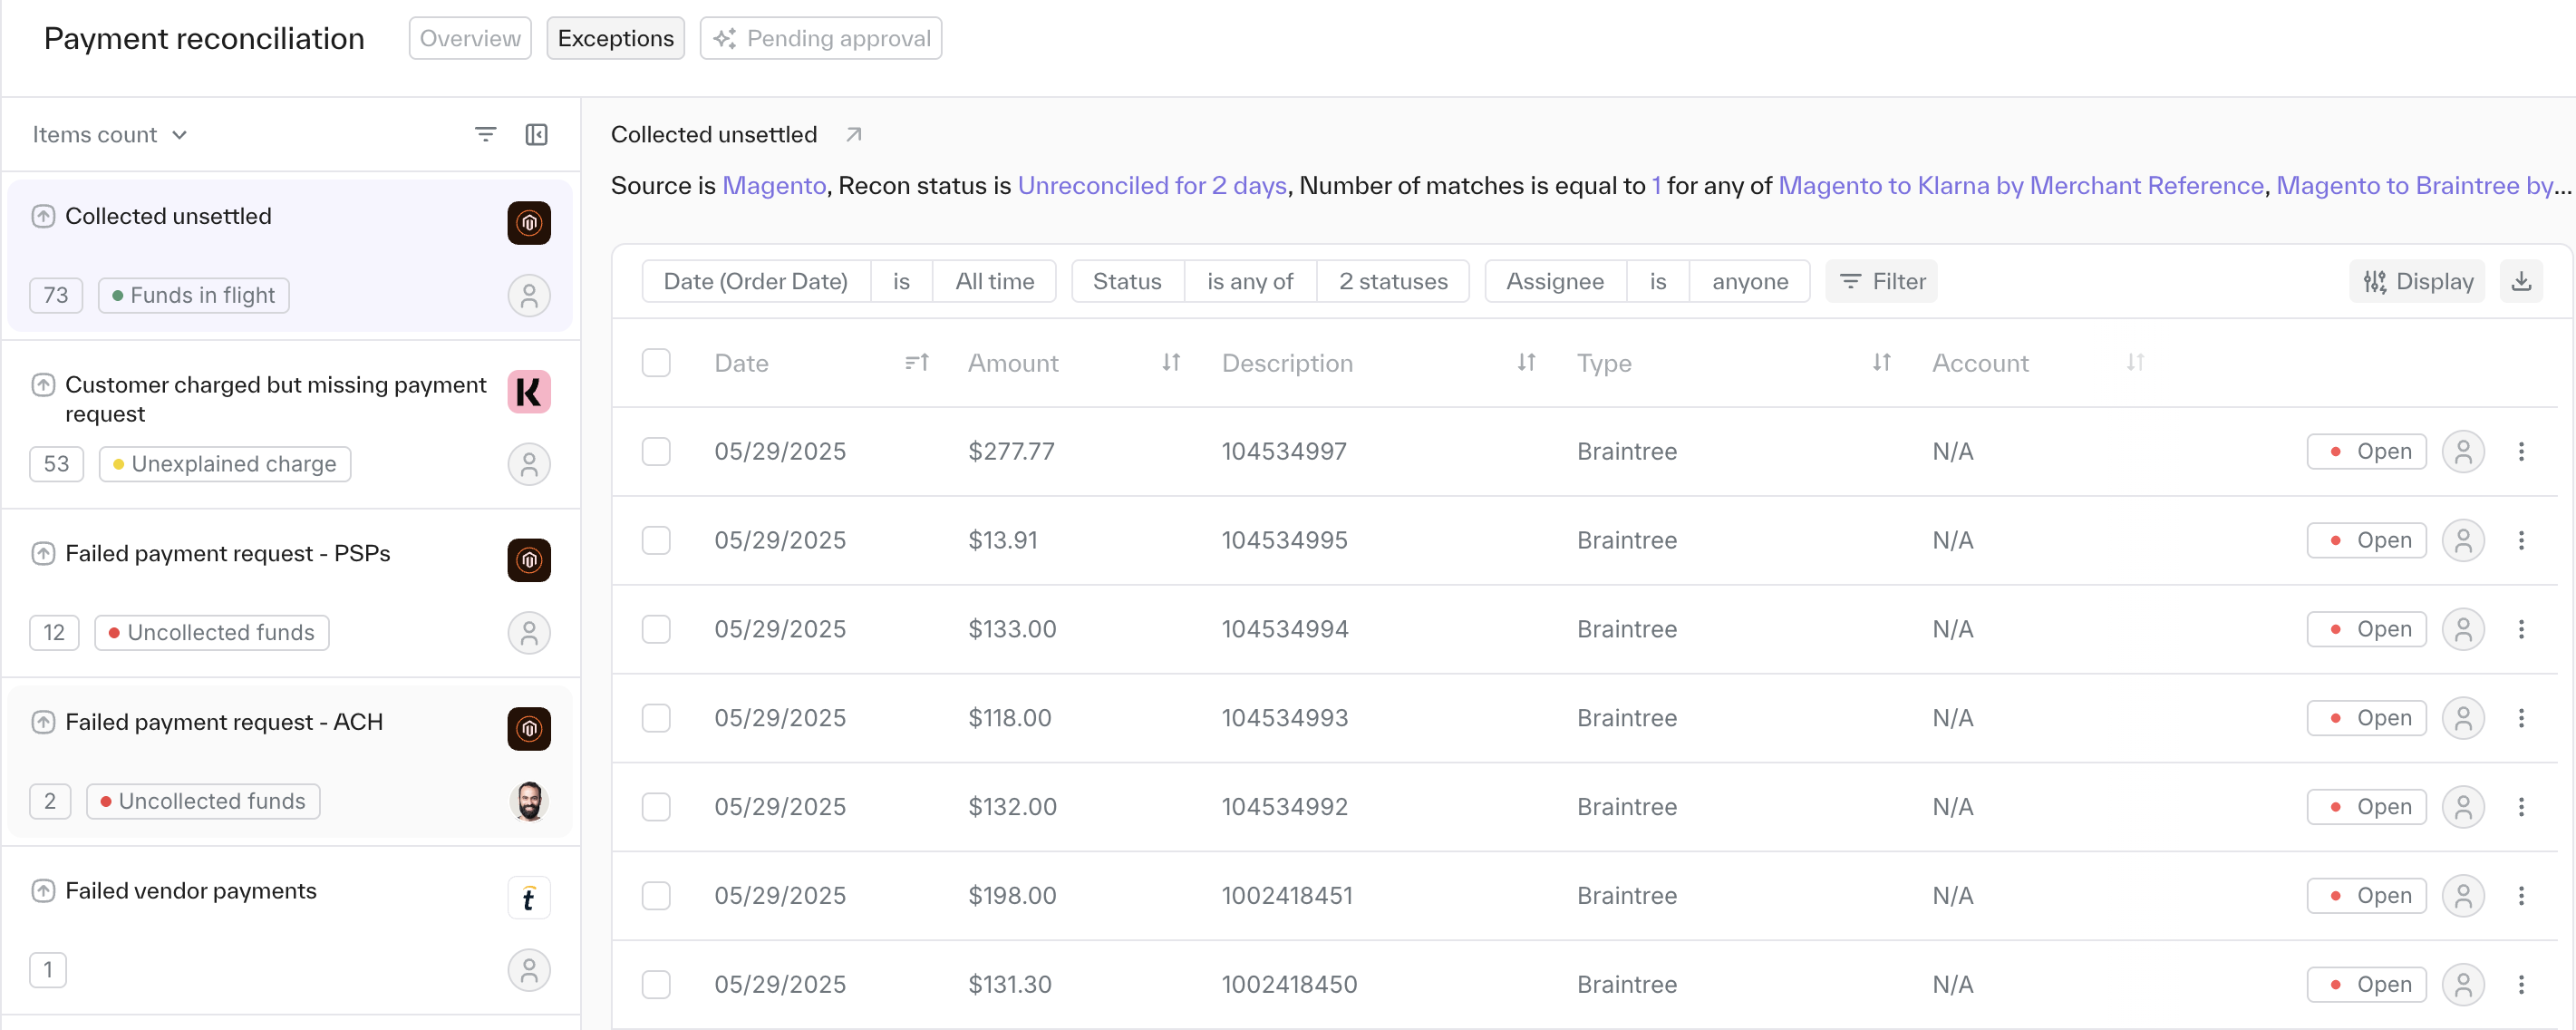
Exceptions
Last updated: September 29, 2025
Overview
Exceptions allow you to automatically flag and direct certain types of transactions into a dedicated view. This makes it easier to investigate or review transactions that require special attention, based on the expected behavior of your data.
How to add a new exception rule?
Go to Flows & rules.
Select 'customer exceptions'.
Click the '+ Exception rule' button in the top right corner.
Enter a clear rule name and select the source you want to apply it to.
Define the conditions that will capture the relevant transactions.
Example: what can be used as a condition?
- type is...
- the transaction was matched to 4 other transactions... using this matching rule..
- recon status is..
Send to queue - this option lets you control when transactions are sent for review. For example, if you know certain database transactions will only reconcile three days after posting, you can delay their appearance in the queue to avoid unnecessary noise.
Editing or deactivating exception rules
Editing: Open the exception rule, adjust the configurations, and save.
Deactivating: Click the three dots on the right side of the rule and choose Deactivate.
Please note: changes for editing and deactivating will only apply to future transactions and will not affect historical data.
Viewing your exceptions
You can view all exceptions in the sidebar under Payment Reconciliation. Exceptions are grouped by the rules you created in the Customer Exceptions section, making it simple to track and review them.